I mentioned doing the brickwork in a previous post but it occurred to me that you might like to see it being done......

This is Bentleys where I used Richard Stacey Versi-bricks for the first
time. Bit of a cheat bringing it into
the Chocolat Blog but I wanted you to see the alternative colour scheme and a
finished wall. This was in their red brick. Chocolat
is in their buff.
When I was about to start
Chocolat’s bricks I went back to my Bentleys blog to remind me about any
‘wrinkles’ and discovered I hadn't really ‘recorded’ how I went about it, so I
thought I would remedy that here.
As usual the first thing is
not to get put off even starting the job. The sight of a couple of thousand bricks and tiles is a bit overwhelming. I even minimise this (possible) deterrent by
just taking a few out of the bag at a time and pushing the big bag ‘out of
sight’. It seems so much better to have
a little heap of bricks that seem to disappear quite quickly when you are
working than to be faced with a bag containing hundreds of them which never
seems to diminish.
Each project will bring its
own challenges depending on the areas to be worked around. Bentleys had recessed windows. I had to brick around them and so needed to
cut and fold bricks for the internal and external edges. Chocolat has windows with exterior frames,
much simpler.
When I did Bentleys I quickly
realised how much easier it would have been if I hadn't added the shop front,
door and trims before applying the bricks.
I was smart this time and wrote myself a note not to add any trim to the
front until I had done the brickwork. Just
as in real life my property would be built of brick and the windows, door, shop
fronts and even quoins would be added on top of that. Clever is as clever does! Guess who forgot the note and guess who has spent
at least double the necessary time on the brickwork because she had to work
around the completed shop front? Yup,
c’est moi.
So when you look at any of
the following pictures try to imagine it as a slab of wood with holes cut in it,
not an elaborately finished front!
When I began Bentleys I carefully calculated and measured the space
needed for ‘x’ number of rows of bricks (and slates) and drew horizontal guide
lines. I quickly abandoned this idea
when I discovered that you never seem to quite ‘hit’ the target line and this just
frustrated me.
On Chocolat I have gone with
a pick-and-mix of occasional horizontal and vertical markers depending on what
I thought I needed where to bring me back on track.
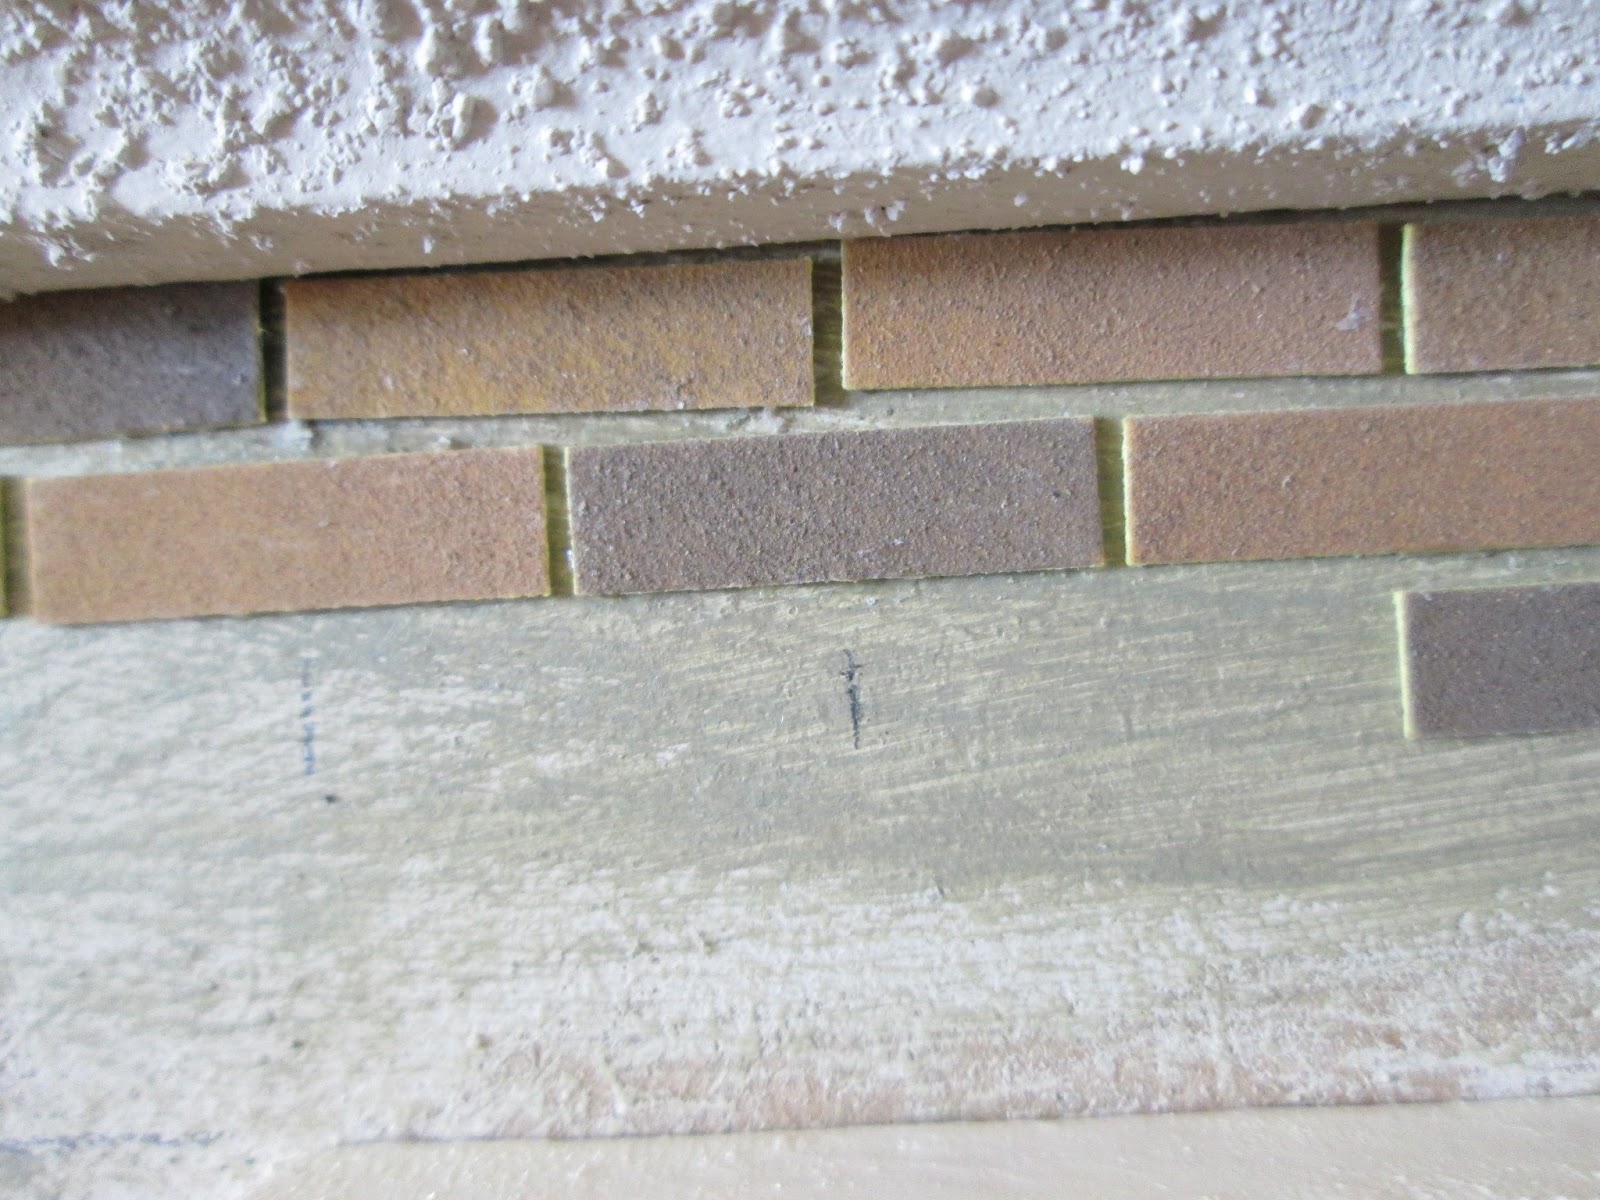
Here, for instance I have
marked a couple of front edges of bricks in the third row to make sure I don’t
wander slightly left or right as I travel across. This ‘wandering off’ is a very gradual
process and is easy to do; by row seven or eight you can be way off line.
I began the whole process in the middle and under the trim at the top of the wall. It is important that each side finishes in (roughly) the same way:
preferably on a whole brick at the end of a row thereby alternating with a half
brick on the row below. Remarkably on both
my projects it actually did this. This probably won’t happen if you work from a
side edge. So that’s the side to side
spaces determined for the whole project.

To get the rows evenly spaced, but fitting between boundaries such as
the top of wall and the top of the windows, is the hardest part. I do this by working over the centre of a
window and dropping a small section of the wall in place, adjusting the spaces between
rows very slightly if I have to. This
way if I don’t manage it very well I will only have a few bricks to prise off
for a retry, not rows and rows of them. I then complete the rows by working from each
side of the ‘fixing’ block of bricks.
I frequently check the position
for the front edge of the brick with the rows above as I go.

I repeated this method for the bottom of the trim to the top of the shop front . This time I was additionally constrained by the rows already in place alongside the windows. All rows have to meet each other at some
point.
Sadly dolls houses are not
cut to the nth degree accurately and/or we humans don’t assemble them using a
micrometer. In O’Rourke’s case the windows
were (a nice) slightly wonky so there was no way they were going to have a neat matching line of bricks running beneath them all.
This was another moment where if I had done the brickwork first (without the windows in place) my life
would have been so much simpler. I ended
up having to shape as many as eight pieces per window to get them sorted.
When I had enough bricks in
place above this line to be confident of being able to mark positions of the
rows I completed the line of bricks across the front of the shop. This acted as a visual guide when I was
filling in the rest of the space.
You might have noticed as I
have gone along that the paintwork looks a bit like camouflage. That is kind of what it is.
I started Bentleys with nice
mortar-coloured paint under the bricks and after just a couple of rows I
realised this showed through like neatly drawn, uniform, pencil lines and
looked totally unreal. I now splodge
various dirty coloured washes around the place after applying the mortar
coloured undercoat. This shows patchily
between the bricks and looks much more like mortar in real life brickwork.

I keep the spacing between the rows fairly uniform by sliding a plastic
card across while the last three or four are still wet enough to move (if needs
be). It is harder to do this vertically
as each row of bricks is offset so I must admit to leaving those gaps to judgement
of the ‘eye’ and the occasional pencil mark.

Here I am pressing the bricks down with a pencil at the same time as checking
the gap. Nothing if not talented!
Depending on the amount of
glue you apply they can want to curl up at the ends. This is not a major a problem, just keep an
eye out as you go and persuade the more recalcitrant ones to do as they are
bid. The rubber at the end of the pencil
is also good for tamping down the odd nuisance.
Here you can see the
various ‘markers’ I have put in place to work from and towards. There's the between trim and shop front rows and the between window bottom and sip front rows and the level line row going right the way across. I do a lot of infilling of bricks rather than row on
row of building.

I don’t have any tips for speeding up the process other than I thought
it might be quicker to cover a small area in glue and then apply the bricks. I am concerned that you would end up with
‘shiny’ mortar when the PVA glue dried in the cracks. I can’t really afford to test the theory with
a large enough amount of bricks on scrap wood but you might want to do
that. As it stands I butter each brick
(carefully) one at a time. I try to
avoid any excess glue squeezing out and generally do well at that but now and
then some does appear. I get rid of it immediately with a toothpick. Don’t leave it with the intention of coming
back to it – (a) you won’t find it easily (b) it will have turned into the
consistency of a rubber hot water bottle.
Try removing that with a toothpick.

If like me you are a twerp and are putting the bricks around all the
fancy stuff, here is a photo to prove it can be done. The L-shaped piece is being ‘dry-fitted’
before I glue it in place. Many rows
needed as many as eight ‘special’ shapes cut to complete the row….. a bit of a nightmare
and it must have doubled the time it took me to complete the upper floor which
is where I am up to right now.

After two days work,
including real life interruptions, I have the upper floor finished. This has taken about five hundred
bricks. I now have to do the slab of a
front otherwise known as the lower floor and a couple of chimneys and I will be
brick-free until the next project. Oh, I
forgot, I do have to tile the roof.
Tools needed:
- Small sharp scissors or a fine craft knife to cut bricks to size (and shape!)
- All-purpose, water-based, PVA glue. I use Aleene’s because that’s what I
have got.
- Plastic card – old credit card or shop card
anything stiff, easy to keep clean as you go and the right thickness will
do.
- I love my little right-angled metal rule and my twelve
and six-inch metal rules, but I am sure any ruler will do
- Toothpick for cleaning out glue between bricks
- Toothpick for applying glue to your bricks. I did my ‘buttering’ with a micro-brush
this time but I am not sure it was any better than my usual toothpick.
- Sharp pencil – cannot emphasise the word sharp
enough when it comes to minis
- Tweezers can be useful
- Loads of patience and maybe something to listen
to – for me, radio four (i-player on my computer) What could be nicer than
gluing bricks with Sandi Tosvig, Rumpole or Book at bedtime?
PS: I love all things ‘Versi. They suit my budget and my way of working and
give a really great finish.
What a nightmare, cutting around all the trim work! But the effect is gorgeous. I really don't see how you could 'rush' this --it's just a matter of patience and long hours.
ReplyDeleteI surprise myself in actually enjoying the mindlessness of it. Hope to post a photo of the finished job in a few days time.
ReplyDeleteHello Em! Your bricks are a Hit! You have done such a Fantastic job of applying them and making the job look so professional in the end. It was Amusing to hear that you had forgotten what you had done before and went to read your own blog for pointers before you began. I have done the same thing too. Your facade of Bentleys is a joy to behold and the time spent has already reaped the rewards of being satisfied with your work rather than having the feeling of "Wouda, Couda, Shouda" I love what you have done! and now I am off to catch up on your other posts that I have missed!
ReplyDeleteelizabeth
Thank you so much Elizabeth - means a lot from you having seen your wonderful creations, such talent on your part, such envy on mine. Can't believe people like you and John read my stuff.
ReplyDelete