Here comes one happy woman. I attacked O'Rourkes today and did better than I thought.
A couple of days ago I began by emailing DHE and the DHE forum to ask what was the best way to remove paper. The official reply was to leave it alone and work over the top but someone on the forum very kindly sent me to some pictures (and text) of a house she had stripped. I wasn't happy leaving the paper on as I could envisage a myriad of problems. So, yesterday, I went at it with tepid water, a 2 inch brush and a smidgen of soap. The scraper was the thing you use when you defrost a freezer.
I confess I was very nervy about slapping water all over MDF and wondered if it would end up shaped like the House that Jack Built. I talked myself into it by realising that the two previous projects have been papered and painted and therefore made wet, why would this process be any different.
It was very hard work and unsatisfying, leaving a zillion bits and a load of glue behind and about half a roof done. This was last night. I got utterly fed up and quit.
Today I came back to it with a purpose and decided to give it my best shot before 'binning' and buying a new kit.
I started by removing the front (hinged) wall and the hinged section of the roof.
I then moved on to demolishing the place. I stripped off every trim, bar one- the door to the outside privy Not too bad to do with a small chisel and hammer. They also came in handy when removing the two chimney breasts. Now I have to plan a project where I can use those - it would be shame to waste them.
 There were a couple of bits of cornice where the maker had obviously had a problem and stuck it on with something like superglue. I had to actually chisel that off a bit at a time but it wasn't that hard to do.
After a bit of rootling round the web looking for any suggestions about removing wallpaper in RL or mini world the consensus seemed to be either half vinegar and half water or half fabric conditioner and half water. I didn't fancy the vinegar one as it had to be followed up with a wipe down with some chemical or other which entailed wearing long gloves (thick rubber kind, not pale blue velvet) and working outside! So, I went back at it with fabric conditioner and water.
Eureka!
Just brilliant. The paper virtually drops off and most of the glue with it. So, five hours later (!) and I had a near pristine carcass ready to go at.
The carpet removal was another pig and a half to do. I had tried pretty much everything but wasn't getting far and was just making a gooey mess. Eventually I ironed it. No, it wasn't a desperate attempt to make it look better, I decided maybe the heat would melt the glue. I covered the mess with a piece of paper and then steam ironed a small area at a time and scraped away like mad at it. I suspect if you start with this method it might work quite well. Unfortunately for me I just had loads of bits and pieces of scraggly carpet left and loads of paper and glue in various stages of removal. I did eventually get it down to something acceptable
I still have the removed wall and roof to do.... but that's another day. Right now I am just basking in the glow of a rotten job finished.
I must just say that the only reason I would ever do this re-make malarkey again is if I already had a piece needing doing (Starfish cottage!) or it was a building I just wanted and could no longer buy, like O'Rourkes. I certainly wouldn't do it driven by cost. This one cost me sixty pounds and something similar like Arkwrights is only eighty pounds; it certainly isn't worth the work to save that amount.
More pictures of the process in the web album.
I came back into the Blog today with the intention of wiping the out the last post as I have pretty much demolished everything I said there but, perhaps, it is a good thing for some of you reading this to see how much chopping and changing and prevaricating goes on when I am doing this stuff. It can only comfort you to know how clear sighted and calm you are about it all.
So, pretty much, forget everything I said three days ago. This is where I am today.
I scrabbled around my stash and found 'stand-ins' for stuff to see what would and wouldn't fit in the rooms if I went with plan A........ Chocolat, the movie.... just not set in France.
Do not panic gentle reader most of the stuff being used in these pictures will not be used in the finished product and none of the walls and floors will look anything like this.
That said, the sitting room (with a front door entrance from the top of the outside stairs) will look quite a lot like this.
Right now I am happy with the furniture in here, other than the two pieces that need repairing and the one that needs cleaning up. The only disappearing trick will be the little side table in front of the settee, it will be replaced with a coffee table.
The bedroom.... furniture..... maybe? Certainly the chest will stay. The chimney breast will go but there will still be a fireplace. The chimney is on the outside of the building and really doesn't need to come inside. It makes for added interest but doesn't suit me.
The false door at the back won't be there like this; there will just be a doorway with a curtain across it. In 'real life', Vianne found she didn't have enough room for her French Empire (sleigh) bed, so the door has been removed and a curtain stops the drafts and keeps the room private from the little landing outside. The landing gives access to a small bathroom. It also has another door which gives access to storage areas and back stairs to the shop. This is a door which can be locked to make the flat self contained above the shop but, as the shop is hers, Vianne can use the space as she likes and have inside access downstairs to the kitchen where she and Anouk eat. Anouk uses a tiny storeroom for her bedroom and she and Vianne use the cupboards and landing space for their clothes and belongings.

Unless, like me, the movie is ingrained in your head the downstairs may be harder to imagine at this stage. I will be building a false wall right across the back (using as little space as possible) so I can replicate the cupboard at the back (on the left side of the room) and the doorway on the right side. In the movie the arched opening at this side of the room showed a staircase. I don't want to give it this much space so I will have a beaded curtain (very sixties) covering the space. Bamboo would be even better. [I do like to set myself a challenge]. Basically I need a simple dresser/some shelving behind the counter arrangement. The counter/bar might do but I would be happier if it were wood. I shall be on the look out for a pub bar I think.
The chimney will go. As I said the back wall will be bumped forward and a cupboard built in. Not too sure if the curtained glass doors are on a dresser or just doors to a room in the movie. I need to take a much closer look. I might just go with my own (Englishy) thing any way.
I need a long plain dresser for the left hand wall with an open base and shelves above and a small glass fronted counter to run at right angles to it.
This side is the heart of the shop where all the chocolates are. The bar area on the right is where the till is and is a place to share a cup of hot chocolate. I must admit I always thought three stools (as in the movie) never seemed as though she was expecting much custom! Depending on the space I may go 'off plan' and squeeze in more seating.
So I am more settled as to where this is leading and will be starting on the stripping down of the building tomorrow.......... Sunday lunch permitting.
P.S. I have done the first draft of the narrative (see the page at the top if interested) so it feels more glued in place and time.
Chocolat will be my third project and the biggest thing I have learned from one and two is to try my best to plan rather than just 'do'.
Wentworth began as Jane Austin's house, moved through to just any old Georgian and finally arrived at a 1980 house in Cheltenham with me and my children in it. This created a lot of unnecessary work and expense. It was the only dolls house I intended doing and then I saw....
The Honeychurch shop and it was to be Le Tout Paris - an Art Nouveau ladies shop. I created a blog and starting buying and stashing things for the project. I then decided the rooms were too small to accommodate my ideas! So, not only did this never happen but I sold the Honeychurch and a lot of things (at a loss!) and bought the Lyddington. This became Bentleys a 1911 shop in Erdington (Birmingham).

Here comes number three - O'Rourkes Post Office, already made up as such, waiting to be transformed into Chocolat - the movie. I wanted to make as close a replica as I could to the chocolaterie of that film (and book). Now I am about to begin I can see a million problems. The building style does not lend itself to a French village shop - probably the biggest problem! I have no idea how to find things to buy which will give it a flavour of late 1950's France. If I am successful the characters should look right. So, I have wriggled into the position of moving the story to a small English village. They would encounter the same problems as in Flavigny-sur-Ozerain but then so do I. They still bring their 1959 Frenchness with them and I am still stuck.
Some more very practical issues also get in the way. I don't want to have to fill a huge shop floor with just chocolates. It means buying or making zillions - either way I am outfaced by the challenge. I also think they sort of get wasted as they are so tiny - about an eighth of an inch if I want to keep in scale - you can't appreciate the work/detail of hundreds of items at that scale filling a shop.
Another practical thought I have also rather changes the time period. Each of my two other projects have been tremendous fun as I learned new stuff all the way along. This time I would like to have a real go at the electrical stuff. I have done the basics of central ceiling lights and fires, now I want to light a shop as it would be done today. I want to figure out how to light a shop sign and how to do lighting in/over display areas. My 1959 French chocolaterie in a small village is now becoming a 2013 chocolaterie/patisserie in a small touristy village in the Cotswolds.
The narrative is essential to the actual physical planning for me. When I know the story of what the shop is and who lives there I will know what I need to do it.
So.... my plan so far, for what it is worth (!) is
- Write the story - this will be a page at the top of the Blog.
- Work out the actual construction of the shop - so far I have had a café downstairs and chocolaterie in one room upstairs and patisserie in the other. I still quite like that. The doubt I have with that plan is that a café means just a lot of similar tables covering the largest area so it doesn't seem to offer a big enough challenge right now. Plan two and the current one is a chocolaterie/patisserie downstairs and a sitting room and bedroom above, with the suggestion of rooms behind. Cliché? aaaarrrgggh!
- In April I need to start on the construction as I am writing an article a month on the project as it goes along - so far - stasis...........
I just bought these little gems from Manor House Miniatures. I have had them before in Bentleys but these are for Chocolat. They are hollow so can be filled and the caps actually screw off and on! The are also the best size - totally in scale for large storage jars of all kinds. the more you buy from Manor House the more they discount the price. These come in pairs. I bought six pairs so they were $1.85 a pair. That's roughly £1.16.
I am so thrilled with these. Seven little boxes of cookies. They are so brilliantly in scale.
They didn't seem particularly cheap at $15 (for the seven), but when you consider the work involved they really are.
My original theory was that I would buy them and undo one of them and photocopy it several times or make a template from it to cut out loads from other papers. I could then fill them with Easter eggs. They look like the standard Easter egg box with a cellophane 'window' and an added flourish on top.
Heavens to Betsy - not a chance. They are constructed exactly like proper boxes that work this way. They have folded over and glued bases and the tops have slits and interlock but they are sooooooo tiny I haven't a hope of constructing them. They are also filled with beautiful and realistic iced cookies. I just love them. I found them on an EBay shop (Thailand?). I have since ordered the unassembled set (half the price) so I can have them in the shop waiting to be made up...... by Vianne, not me!
These next two photos show $20 worth of bits and bats from Nancy's - my local doll's house shop. I had a credit note for something I bought and took back, so I thought I would pop in and spend it on quarter scale - another story!
Unfortunately she doesn't have quarter scale (she does have half scale) so I just meandered around picking up a miscellany of (reduced) things I fancied. They all turned out to be things for Chocolat
The jars will be on a sweetie shelf somewhere. The rabbit with sweets is great for the Easter sales setting and the lovely little copper pan is the one on a ring (in the movie) ready for making hot chocolate. I may have to fill it with hot chocolate (Fimo?) before it goes in place.
The cups and plates are for stacking on a shelf ready to go. I am not keen on plastic but hope they will look OK when painted. One issue I have with plastic things is they don't look as though they have any weight in them and don't therefore seem to 'sit' realistically in a project - maybe these will change my mind.
These photos will be added to Chocolat - Purchases web album
This show is written up more fully in Bentleys Blog but I wanted to record the few bits and pieces that were destined for Chocolat.
These are from True2Scale .
I have been wanting the pitcher and forsythia for ages. If you check out their site you will see the lovely Eiffel tower stand they do. I want to fit it in Chocolat somehow - it might happen; but I managed to resist for now. I didn't resist the lovely dishes and decals even though I have no idea whether they will fit the story!
The lovely cake boxes certainly have a home and pride of place.
At Ron's stall (Dollshouse Shop, Orlando) I returned four of my five Little Women for something else. I had decided before the show I wanted a better pretty pleater, which he kindly brought to the show for me. I added in these three cute cake stands. The red one is destined for the window display.
I bought this trio from Marie's Minis. The bowl of nuts was for Chocolat; I then remembered it is set in Lent so seasonally they are more suitable for the October setting of Bentleys. The hyacinth, though,is for Chocolat to help pin down the timing. The jug and bowl may just join my Little Women stock of Victoriana for an (as yet) undreampt of project.
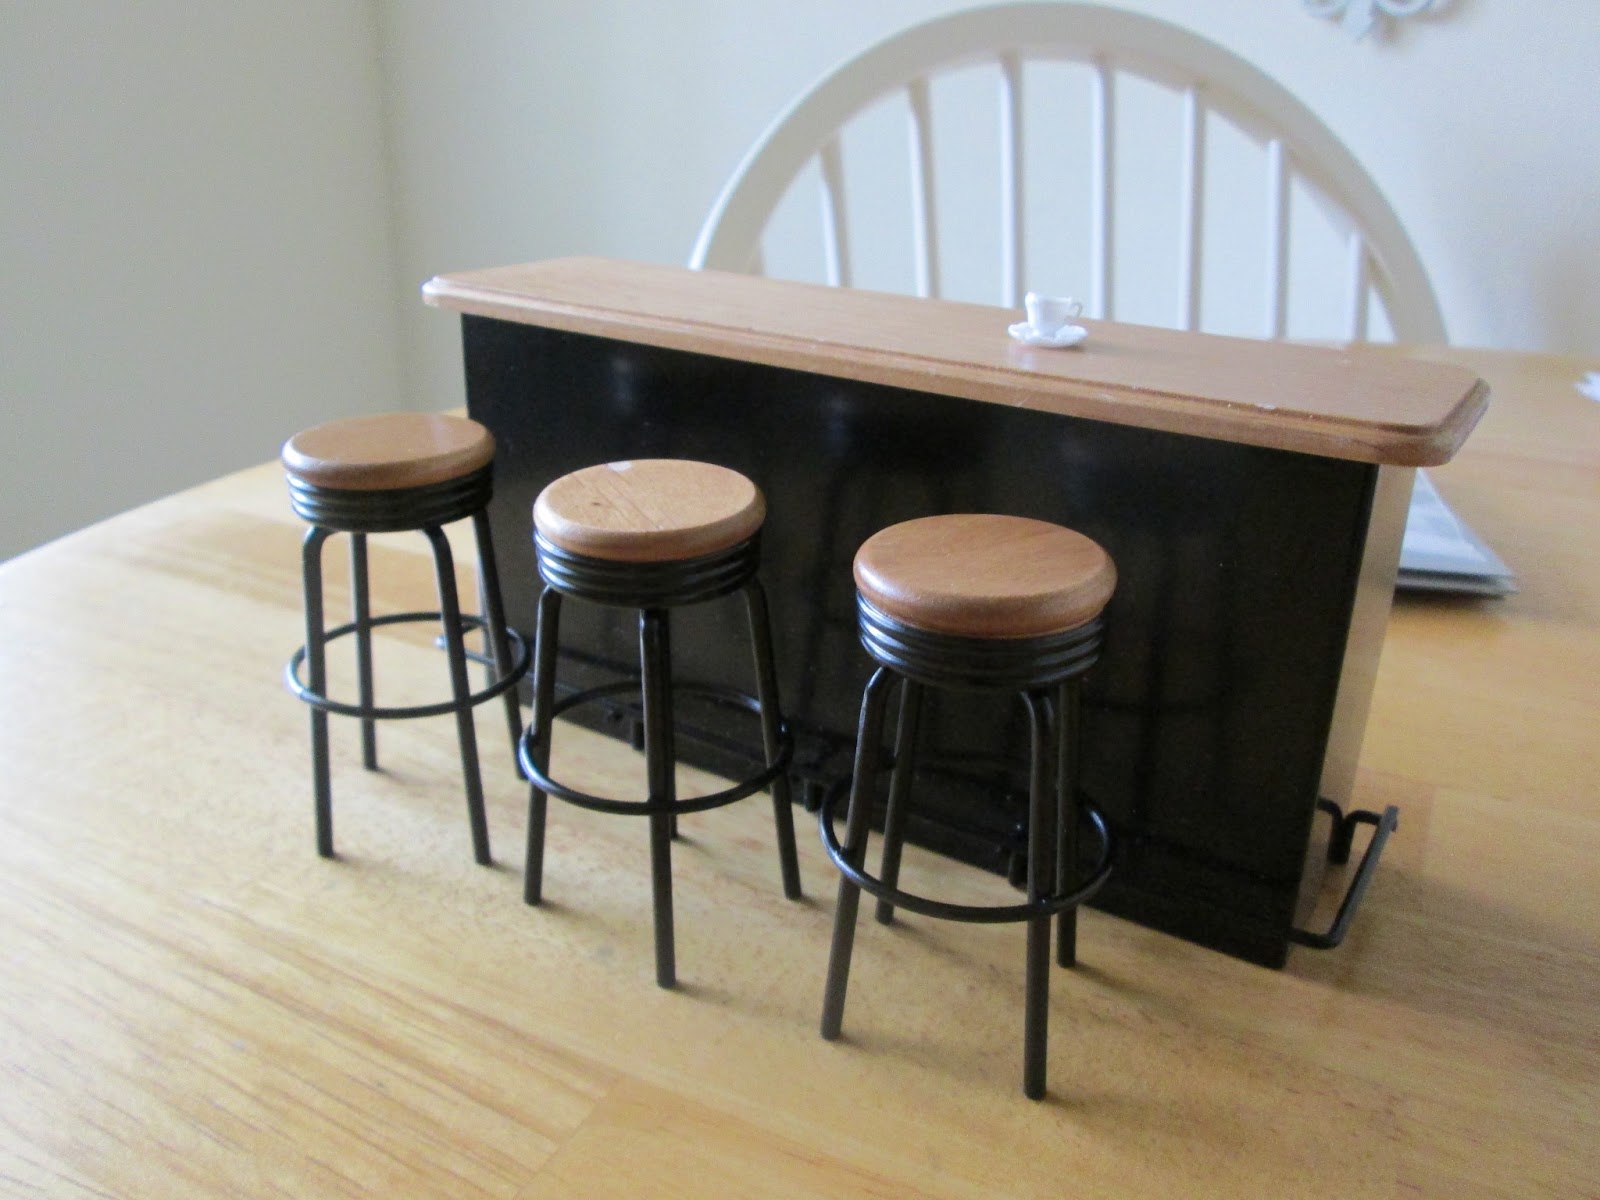
From Feather Your Nest I got this little set for $34 (£21.45) which I thought was a good price as I had been looking at the stools in various places at around eight dollars plus. It was absolutely bought for Chocolat as there is something like it in the movie BUT as my project may be in the throes of veering away from the original it may end up in Starfish Cottage. I put a cup and saucer on it to give you a sense of scale.
For a few weeks now I have been talking to (emailing) the extremely patient and helpful Martin Butler of Small World Products Ltd discussing his great lighting system. He had read my article about my frustration with removing and replacing pins on the plugs which come with the round wiring system and suggested I might like his system better. I do before I even use it.
The solution to my frustration is his Power Centre (SW01&SW01S). This is the basic component of the system. It connects the wires from the lights and fires etc to the transformer/power supply via ten pairs of screw terminals. So instead of removing a plug, threading the wire through a hole in the house and reconnecting the plug to shove it in the wibbly wobbly power strip all you do is cut off the plugs, thread through your hole, strip the wires a little and and connect to a simple terminal. No more dancing round the room with plug pins in your teeth.
There is also a power centre with individual switches (as shown in this (bad!) photo) so you can turn things on and off individually at will if you want to.
This is a picture of the rest of the various bits of kit that I have as a starting point for Chocolat.
I'm not talking about it in detail here as I will do that when I come to actually use it, but I wanted to give you a heads up about it in case you are about to buy your wiring system for your house. Trust me - this is the way to go.
He has anything you could wish for any size project. You decide what you want to do and there will be a way to do it - simply.
This set was intended for my American house - hence the American plug in the picture, but as that has been kicked into touch, it will now move on to Chocolat.
I never thought I would say this...... I am actually looking forward to doing the wiring! Watch this space.
PS: for anyone who is a bit girly about this stuff - and that includes me - don't be put off by it looking a bit electrical/technical - it isn't it is just that most of us don't mess with stuff that looks like this. In a nutshell - you are replacing those nasty plugs and sockets with a simple bar of screws - open up a gap, insert the wire and screw it back down - just like you already do on the transformer connection - what could be easier?

 There were a couple of bits of cornice where the maker had obviously had a problem and stuck it on with something like superglue. I had to actually chisel that off a bit at a time but it wasn't that hard to do.